
Rubbish tips: The Pocket Farm guide to composting

Start a compost heap now and, using these easy steps, you could have your own recipe fertiliser on tap in no time…
Step 1. Choose your container. There are many types of composting bin available from compact designs for smaller gardens to tumbling varieties that produce quick results. If you are feeling more adventurous you could attempt to make your own (see pic above). A maximum of 3 feet square is generally considered best.
Step 2. Decide on a location. Place your bin on a level surface where worms and other creatures can easily get in. Directly on soil is fine but any surface with drainage and aeration can work. A warm, sunny spot will also aid the decomposition process.
Step 3. Adding your ingredients. Try to get a good mix of organic matter in your compost heap. Fruit and vegetable peelings, grass, weeds, cuttings, tea bags, coffee grounds and leaves all break down quickly and can be layered with egg shells, shredded cardboard, paper and tissues, thicker woody material (cut up small), vegetarian animal waste and even household dust. This will ensure that the correct proportion of nitrogen and carbon is present. Grass cuttings should be mixed with more course material to keep them from matting together and turning to slime. Try to keep paper and card to below 20 percent of the total volume.
Do not add meat, dairy products, cooked vegetables, cat or dog waste, diseased plants or invasive weeds such as bindweed. Shiny paper and hard objects such as stones and plastic should also be avoided.
Step 4. Keep it moist. If the heap is too dry add a sprinkle of water. If it gets too wet mix in some cardboard, paper, or brown leaves. Help to get oxygen into the pile by turning it occasionally.
Step 5. In 6-9 months (sooner if you are really dedicated or use a tumbling bin) you should be spreading the finished compost on your beds, improving soil quality and water retention and discouraging weeds.
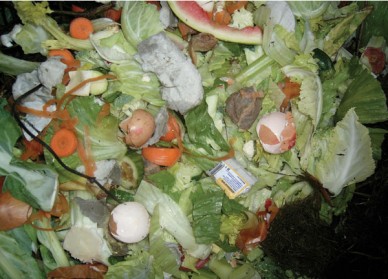
Above: Eggs shells, tea bags and cardboard can all be added to your compost heap for a well balanced final result
Most recent Growing articles
- Five unusual and versatile vegetables to grow this spring 24th January, 2016
- Composting: what is it and why should you be doing it? 02nd November, 2015
- Know your onions: Growing onions, leeks, shallots and garlic 15th June, 2015
- Growers’ yearbook December – edible hedgerows and other ideas 01st December, 2014
- Growers’ yearbook November 04th November, 2014
- Growers’ Yearbook: October 04th October, 2014


About Pocket Farm
Pocket Farm is a community for like minded people interested in self-sufficiency, farming, conservation, ecology and rural crafts.
© Pocket Farm Magazine, 2025. All rights reserved.


Leave a reply