Incubating and hatching with a broody hen

Having decided that you would like your broody hen, which for the purposes of this article will be known as ‘mum’, to hatch some chicks, you have a couple of things to think about immediately.
Firstly eggs will only be fertile if the hens have been running with cockerels, if this is the case all is good, but if there are no boys in the camp you will have to procure yourself some fertile eggs of your chosen variety pretty rapidly. The other thing you will need to consider is that 60% of all hatchlings will be male and for reasons such as noise or dominant and aggressive behaviour they may need to be re-homed or dispatched before undesirable male traits develop.
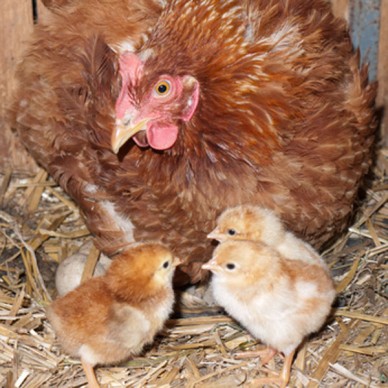
A broody mum will have prepared the nest ready for her babies and will sit on just about anything egg-shaped and be very possessive of them. If you need to replace her dud clutch with fertile eggs it is now that you will have to surreptitiously swap them over – this is most easily done at night when she is drowsy or asleep. If possible, buy fertile eggs that are known to have been laid on the same date, otherwise carefully mark dates on them with a pencil so you know when to expect them to hatch. Don’t place more than your hen can comfortably cover.
You will need to keep an eye on your hen while she is incubating, particularly a young and inexperienced one. Some will show no inclination to leave the nest and in this case they should be lifted out manually and placed by the feed and water containers. Make sure she does eat and drink, even if only a small amount, in order to help maintain her good health. She may also pass a very large, pungent ‘broody poo’ before returning to the nest to continue incubating.
While mum is stretching her legs check for any damaged eggs and remove any you find, but do not re-arrange the eggs. Mum will constantly move the eggs around so that those on the outer side of the clutch will be moved to the centre and vice versa to ensure that they are all kept at a constant temperature.
Housing your new clutch
It is important that mother hen and her offspring be housed separately from the rest of the flock as left with the general population the chicks may be killed. Whilst your broody is incubating set up housing and a run with a small gauge mesh either in a sheltered area outdoors or in a garage or shed, depending on the time of year. There is some debate as to the best time to move your hen into the broody enclosure as some will take well to a new nest easily whilst others will be completely put off buy it and abandon their eggs. Again, night time is good for this, carefully move the eggs to the new nest and then, as gently as possible, holding her so she doesn’t flap and get stressed, place your hen on them and leave her to settle. Keep her confined for a while until she seems comfortable in her new environment and cross your fingers. Just like any neonate, human or animal, chicks are vulnerable, fragile and need frequent care and attention. When creating an area for remember that housing needs to be big enough to allow them to grow and move around, not forgetting that mum will be living with them. Just like any chicken coop it needs to be ventilated but draught free and predator proof and the run similarly so, even if it’s inside another building.
The nesting area should be straw and it is a good idea to dust with mite powder before you move your hen in. The floor of the house will need to have a layer of some absorbent material underneath the bedding – kitchen roll or medical style tissue roll works well and helps avoid slipping injuries. This is important because, despite their age and size, siblings will immediately start pecking at an injured chick and may even kill it if it is not removed.
Over the tissue there should be a layer of soft and absorbent bedding such as small, dust extracted, wood chips. Avoid cedar shavings as these can release lots of dust which is not good for the young birds. Be prepared to change all bedding and floor covering more than once a day because one thing chicks do, among others, is poo a lot.
They’re coming
It takes twenty one days from the last egg laid for the eggs to hatch but broodies have a sense of their babies from a very early stage in their development and some will even be able to tell if an egg has failed and discard it. As the time for hatching draws near mum is particularly protective of her babies. She twitters to them and taps on the shell. Until the egg starts to peep (the beginning of the actual hatching process) only the hen can hear them but once the chicks are ready to hatch you’ll be able hear them cheeping or tapping on the inside of the shell.
This is the time to leave nature to take its course, mum will do what is necessary. Your job is to monitor the situation carefully. It takes at least twenty four hours for a chick to finally make it out of the egg. Firstly, you may notice a crack or chip on the outside of the shell which gradually increases as the chick makes progress. It will chip away for a short time, then takes a break for as long as twenty minutes before chipping away more of the shell. Mum gives as much encouragement as she can but once the first chick is hatched her priority will be the care of that firstborn. It can often appear that a chick is having problems trying to hatch. You can feel very tempted to help it out by taking some of the shell away, but you must resist this temptation as you could do more harm than good at this vital stage. Only an experienced chicken keeper or breeder should attempt to assist.
After the expected hatching time of all the eggs has expired you can remove any un-hatched ones and test in a bowl of warm, not hot, water. Floaters could still be fertile, sinkers will have failed and should be discarded.
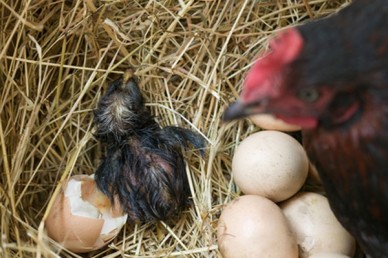
When a chick first hatches it is very tiny and wet (see pic above); in fact it can look rather ugly. Do not handle any newborns at all, they will stay underneath mum where they will dry out into a more familiar fluffy, cheeping chick. Do not remove its broken shell immediately, leave it in place for at a couple of hours to give the chick a chance to detach itself fully from it. It should then be removed so it cannot cause any damage with its sharp edges.
Oh crumbs! Feeding your chicks
Newly hatched chicks will survive for twenty four hours on the internal yolk sac that sustained it whilst growing inside the shell. It can actually manage for forty eight hours but it is always best to provide an alternative food source from the start.
Chick crumbs and water should be available at all times as chicks eat and drink a lot, and grow very quickly – a small amount of fine oyster shell grit can be added to the feed from the word go. Mum should have her own food, placed out of reach of inquisitive youngsters. You will soon learn that chicks are lively, messy and sometimes noisy. To prevent accidents, it is worth investing in a feeder and water container designed specifically for chicks. Contents of shallow-sided dishes will be spilled or become contaminated very quickly.
If you decide to vaccinate your chicks this should be done at one day old and, until you are more adept, by an experienced poultry vet. This will protect them from all know poultry diseases and is recommended, however, if you have lots of chicks this can become expensive.
If you decide not to vaccinate then the starter chick crumbs which you feed should be the medicated type as this will protect the chicks from coccidiosis which is highly contagious and can kill all your new born chicks within twenty four hours.
They grow up so quick
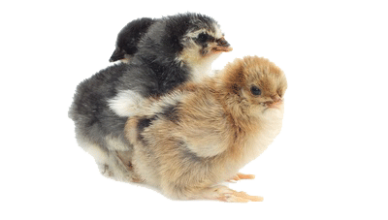
At 4-6 weeks the chicks should be gradually weaned off of crumb and onto growers pellets. This should be done over a period of 7-10 days to allow then to get used to the difference in pellet size. They will be ready to leave mum at six-to-eight weeks old. Note: some hens will abandon them before this age which, depending on when this happens in the chicks’ development, may mean finding another broody that will accept them or hand rearing them.
To reintegrate them move the brooding enclosure back next to the main run for a few days beforehand, this gives them a chance to get acquainted with the other hens and a better chance of being accepted back into the main run un-accosted.
Note: If you have a broody hen that will not be hatching eggs and you need to stop her sitting then go here for more information.
2 Comments
Leave a reply
Poultry categories
Most recent Poultry articles
- Preventing egg laying problems in older hens with implants 15th March, 2017
- Integrating new chickens into an existing flock 15th May, 2016
- The nests in my heart – a personal view of ex-battery hens 22nd March, 2016
- Chicken FAQ: your most common chicken keeping questions answered 19th January, 2016
- Hens and herbs – no this is not a chicken recipe 08th October, 2015
- Feeding chickens: a balanced diet for backyard hens 16th April, 2015


Superb article and one to remember
Hi – we retrieved a chick just hatched and a couple of eggs as the hen and siblings were attacking the former and abandoned the latter. We managed to pull the wet chuck through by keeping near the Aga and the egg hatched in hours. Both are now three weeks old but we have tried to reintegrate with the mother and her two other chicks and also with another trio but they ignore them for a bit and then charge and attack then so we have to retrieve them! Any ideas?
Many thanks