Craft project: bottle cap fishing lures

Lures for predatory fish are available in all shapes and sizes for a few pounds from your local tackle shop but here at Pocket Farm we much prefer the challenge of creating comparatively simple items like this for as little money as possible. If we can use materials that would otherwise have been sent to the tip then all the better.
This tutorial is a step-by-step guide to making a bottle cap spinner. It’s not a new idea, people have been making them since the advent of the modern bottle cap itself, but the beauty is you can make them as simple or complex as you like and rustle one up from household materials in as little as 15 minutes.
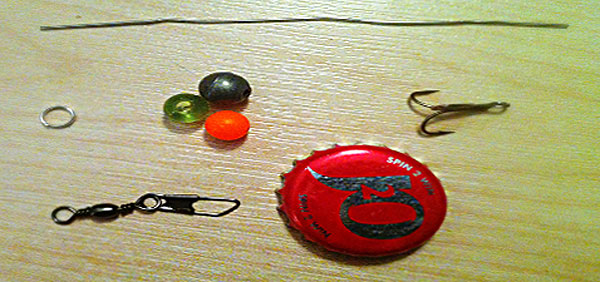
Collect your materials
The most basic bottle cap lures need only a bottle cap (your local will have hundreds of these that they will happily let you have) a hook, traditionally a treble, something to join them together such as wire or split rings and some weight to help it sink. The weight can be anything from large shot to gravel as it will be hidden inside the cap in the finished article. You may also like to incorporate swivels to attach your line to and stop it twisting when retrieving a cast.
Design is limited only by your own imagination and you will soon be incorporating all manner of beads, spinner blades, head weights, googly eyes, feathers and fibres.
We will start with a simple, classic, design
Tools
Pliers (needle nose and normal)
Wire cutters,
Drill with 2mm bit for metal
Tin snips (if cutting your own blades)
Nail or similar for forming loops in the wire.
Assembly
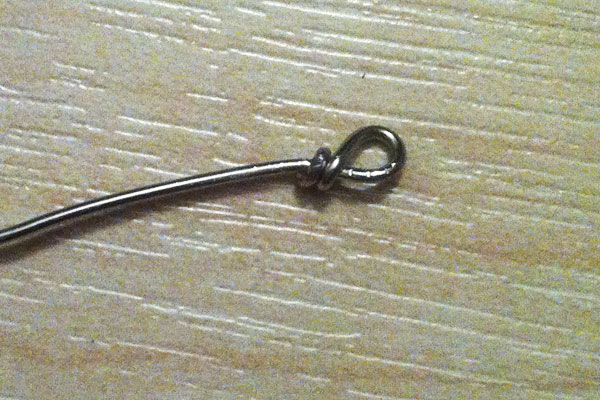
First thing to do is make a loop in the top of a 15cm piece of wire. This can most easily be achieved by wrapping it around a thin round object such as a nail and then wrapping the end of the wire around itself (see pic). The wire should be approximately the same gauge as paperclip wire, any thicker and you will have trouble bending it and, if you use bought accessories you may struggle to get it through the standard drilled holes You can incorporate a swivel in the loop at this stage or clip one on later.
You now have your centre cord that you will slot everything else onto.
Although in its simplest form you don’t necessarily need one, adding a spinner blade will increase attractiveness and is well worth considering. This should be the first thing threaded onto your wire. You can buy them cheaply from tackle shops but you could just as easily cut one from a spare piece of thin sheet metal if you have some lying around. If you do cut your own make sure you take off any sharp edges with a file or wet and dry paper.
Slip the blade on first, either directly onto the wire or attached to a clevis (pic) which will help it spin more easily. Clevises are available from tackle shops or online and although you can fashion one from wire they are so cheap that the cost is worth it for the improved performance.

Close up of the spinner blade assembly showing the clevis
Add a bead next. Any colour is okay as fish will sometimes go for the most unlikely looking devices but if you want to keep it natural think about the colours you would find in your quarry’s natural diet, silver is always a good start with maybe orange if you wanted to mimic a roach for example.
Next is your bottle cap. Choose one that suits your design and bend it (again, using some thin bending aid such as a nail can help) almost in half. At each end flatten an area using needle nose pliers where you can drill holes opposite each other using your 2mm bit, see pic. Be very careful to hold the cap securely in a vice or with pliers when drilling to avoid accidents if the drill slips.
Slide your bottle cap onto the wire, pop some of your weight material into the cap and squeeze it shut. As well as helping to sink your lure the weight material may rattle about in the cap which will also add to its attractiveness. You may need to adjust the ends if they pop out slightly when you finish the bend. Add another bead and you are now ready to finish off with the hook.
You can attach the hook directly by slipping the eye of the hook over the wire and bending it round to finish as you started by creating an eye with the wire. However, this can be dangerous so we would recommend creating the eye in the wire first and then connecting the hook using a split ring as shown below.

It is safer to attach the hook using a split ring – it’s also easier to replace broken hooks this way
And there you have it, all ready to go.
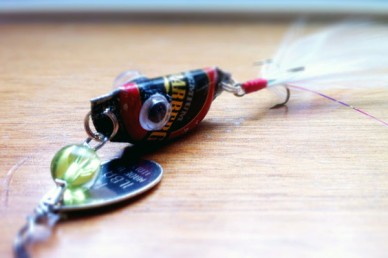
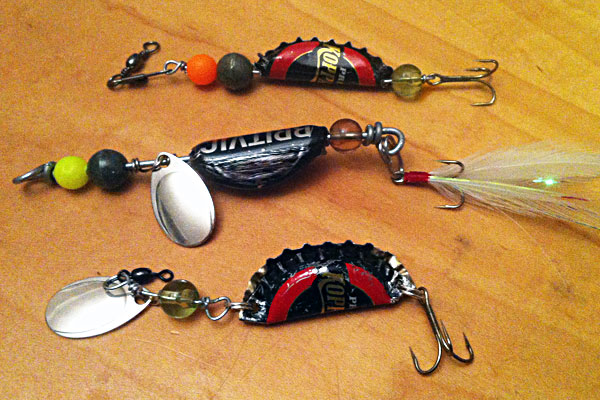
Below you will see some more designs. One uses split rings at both end of the cap instead of the full length wire and another has feathers and floss whipped to the hook to add more interest and hopefully make it irresistible to our local pike, perch or a particularly hungry chub.
Send in pictures of your designs and of any fish you catch using them, we’d be interested to see which materials, colours and designs are working best.
Tight lines.
Update
….and just to prove they actually work here is a picture of a Jack pike I caught using the bait fish design shown at the top of the feature. First attempt came to nothing (it was mid-summer which is not a good time for pike) but this one was taken on my second attempt in mid-September. He’s small but nevertheless still very exciting to catch on homemade tackle. He was returned none the worse for wear straight after his photo shoot

5 Comments
Leave a reply
Crafts categories
Most recent Crafts articles
- Paracord weaving: make a survival bracelet 17th January, 2015
- Picture tutorial: Make a PVC pipe bow 03rd January, 2015
- Shake it up – handmade coconut shell maracas 05th November, 2014
- Craft Project: Handmade Bamboo Flute 30th October, 2014
- Craft project: DIY bottle cap tambourine 21st October, 2014
- Project: Making a CD drop spindle 24th April, 2014


Can’t wait to have a go at making these.. and i dont go fishing!
Will make them for friends to test!
Desearía que todo este artículo me fuera enviado en español, a la cuenta de correo indicada anteriormente, ya que desconozco el idioma inglés y estoiu interesado en su contenido. Graciias de antemano
It great to hear that you are interested in the content of our site. Unfortunately we can’t produce translations in Spanish but Google translate should make a good job of the majority of it.
I’m going to try making these for my son in law for Christmas. I’d like to glue on eyes. What type of glue works the best.
Thanks
The worlds best mother in law. Lol
Any waterproof glue will do it. UHU or 2 part expoxy work fine