An introduction to Fly Dressing - your first flies

So, why would you set about tying your own flies when every tackle shop in the land has a myriad of pre-tied patterns readily available? Well, there is cost, after the initial outlay for tools and materials it is possible to tie several flies for the price of one shop bought lure. More than this however, it is the satisfaction of creating something that you can take to the water and catch fish on – believe me catching a trout on a fly you have tied yourself gives you a real buzz – that really clinches it.
What equipment will you need to tie your own flies?
There are so many aspects of the art to learn about, from materials to fishing techniques and entomology to the quarry itself but, as with most hobbies, you need to learn the basic skills first to get the most out of it. This is most easily done by joining your local fly dressing club where you can swap information on all these subjects(and a good deal more) and which will usually hold classes, at very little cost. You will need a basic tool kit of a fly tying vice, bobbin holder, a dubbing needle, a pair of hackle pliers and a good pair of scissors to get you started and finally you will need some materials to create your fly with. The list of materials you can use is endless with both traditional and modern variations you can choose from but, initially, the basic requirements are tying thread, hooks in various shapes and sizes, some cock pheasant tail feathers, dubbing materials (such as hare and rabbit fur or imitation seal”s fur for bodies) hackle feathers and some fly tying varnish or clear nail varnish. All these will be explained in more detail as I take you through various patterns in later articles.
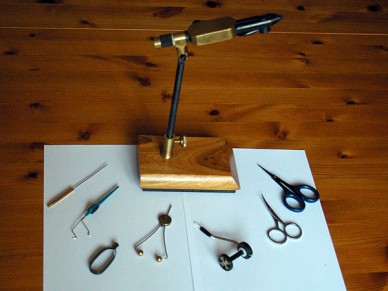
Basic fly tying equipment showing vice and (from leftto right) dubbing needle, whip finish tool, hackle pliers, bobbins and scissors
Start with a simple pattern
Probably the easiest fly to tie is a buzzer, this is a pattern that represents the larval stage of any small fly or mosquito. As well as being a good starting point for the novice it is also a staple pattern in any fly box as these imitate a regular, year round, food source for trout. You would almost always use these on a lake or other stillwater. The tutorial below will give you some idea of how to tie this pattern and it is a great one to practice to improve basic thread control.
For this pattern you will need:
1. Shrimp/buzzer hook size 10
2. Some bright orange thread
3. Red holographic tinsel
4. Varnish or clear nail polish
Step one.
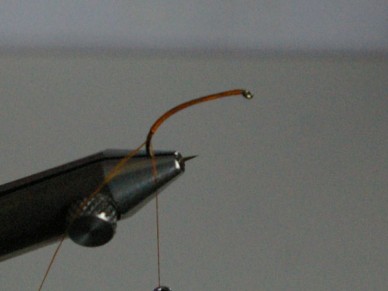
Place your hook in the vice and wind on some orange thread and wind it down the hook shank, in close touching turns, to round the bend, leaving the tag end long.
Step two.
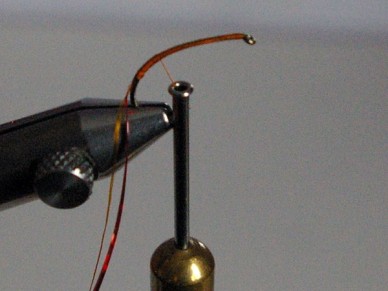
At this point tie in a 4/5 inch length of red holographic tinsel.
Step three.
Take the thread back up the hook to a point 6mm from the eye of the hook, now wind the thread forwards 3mm and then backwards and forwards over this area, creating a small oval bump for the thorax, finishing at the rear of the bump.
Step four
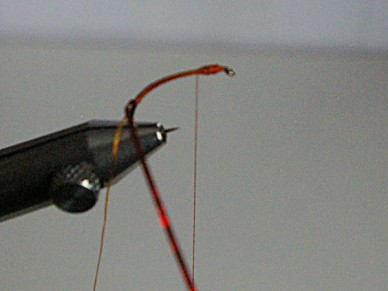
Wrap the tinsel forward over the thread, in overlapping turns to the start of the thorax, now wind the tag end of the thread in open spiral turns to form the ribbing, this gives the suggestion of segmentation, secure with the main thread and cut off the excess. Take the remaining tinsel forward over the thorax, secure with thread wound over and over itself and tie off. Varnish over the fly and allow to dry.
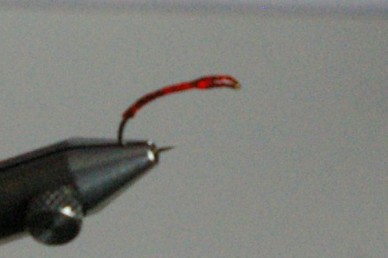
This pictorial sequence shows that with just four elements you can tie a fly that will catch fish. Don’t worry if this sounds complicated, it is difficult to describe the actions in words but the video tutorial below should make everything much clearer.
Derek Cross is secretary and “Hackle” newsletter editor for the Hertfordshire Branch of the Flydressers Guild. The club hold classes for all levels and has a varied programme of speakers, demonstrations and social events. For more information please visit the website or email: hertsfdg_membership@bigfoot.com. Novices can call Darrell Howard on 07092 016 016.
Crafts categories
Most recent Crafts articles
- Paracord weaving: make a survival bracelet 17th January, 2015
- Picture tutorial: Make a PVC pipe bow 03rd January, 2015
- Shake it up – handmade coconut shell maracas 05th November, 2014
- Craft Project: Handmade Bamboo Flute 30th October, 2014
- Craft project: DIY bottle cap tambourine 21st October, 2014
- Project: Making a CD drop spindle 24th April, 2014




Leave a reply